
A Brief Podcasting Primer
If you don’t already know what a podcast is, it’s basically a radio show that people can stream or download to their own devices. It’s like listening to radio a la carte in that you can pick and choose what episodes you want to listen to–and you have the power to fast forward and rewind.
Podcasting, and teaching kids how to podcast, is easier than you think–and you’ll be amazed at what your students can create. When students produce a recorded audio version of their writing, something changes in the way students approach the project. In my experience, it seems to be easier for them to see how their words will impact their audience, and the process of weaving in their own voice becomes more concrete. Podcasting also carries a connotation of entertainment that lends itself to heightened storytelling.
Is podcasting easy and perfect for every single student? Does it fix every broken piece of Writing instructions? Of course not. But I can say this: in my classroom of 3rd and 4th graders, podcasting has breathed new life into my students’ writing, and the “change of scenery” has opened paths to learning that had previously been walled off.
Oh, and did I mention you don’t have to worry about grading for Writing conventions? So, if nothing else, there’s that.
Getting Started
In order to crystalize a vision for success, it can be helpful to see–or hear–what success will sound like. When I first started, I looked for the kinds of podcasts I’d want my students to create. Below, you’ll find some podcasts I found on my mentor text scavenger hunt. When I search for mentor texts, I’m looking for podcasts that are geared toward my student demographic and that cover the kind of content that they’ll be digging into for their projects.
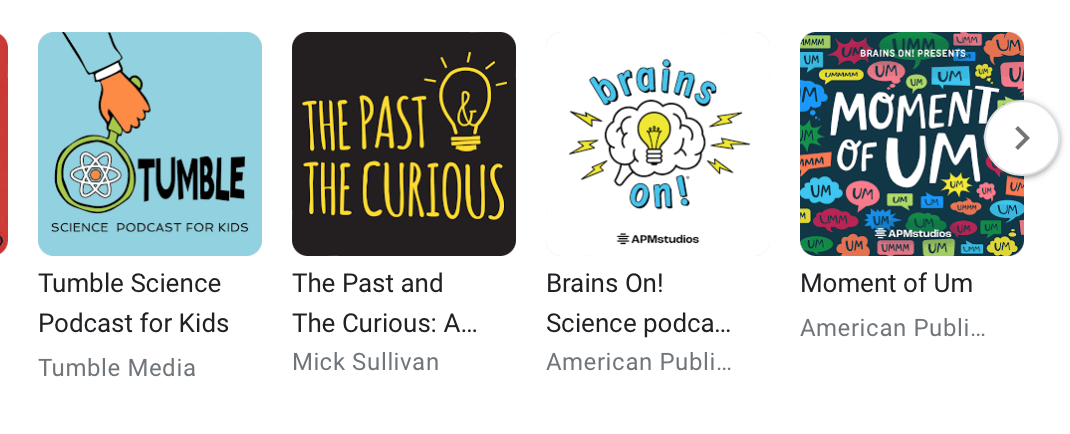
It’s okay if the mentor texts you find aren’t perfect–in fact I’ve found it just as useful for students to hear flawed examples as it’s been for them to hear good ones. For example, in an episode of The Past and the Curious, my students felt bored by an overly long introduction. So, I added a “Notes to Self” column to our “What Do We Notice” chart, and we added “Avoid overly long intros” to our mentor text notes.
There are lots of ways you can introduce mentor texts by the way. Every second or third class, I’d open with a 10 minute podcast study, and we’d keep track of positives and flaws in our notebooks. By the time students recorded, we’d amassed quite the criteria list. For a rubric, I give students 3 “Must-haves” to make sure that their eventual podcast scripts would address my essential questions and, of course, avoid plagiarism (if students are creating podcast episodes that include research). Then, students choose from their “We Do We Notice” list and “Notes to Self” list to round out the overall Criteria List (like a rubric, but not quite so rubric-y) with “Must-haves” and “Can-haves.”
| Must-haves | Can-haves |
| Answer [essential question 1] Answer [essential question 2] Have an introduction ->Intro shouldn’t be too long Key ideas should be explained so that they make sense Have a conclusion Include a list of sources in the show notes Contain at least 1 “Can-have” | Can be funny Can have sound effects Can feature interviews Can use music Can have ads |
Depending on the project, once they’ve covered enough ground with their research, experimentation, or other inquiry work, students start to develop their own podcast scripts. In Science, students keep detailed notes throughout their inquiries, and for research projects, I have students pause periodically to add their own thinking to their notes.
I also put students into peer groups so that they can share their progress with classmates and get regular feedback. Moreover, because I use a workshop approach, I can teach students one-on-one or in small groups as they perform their inquiry and draft their scripts. At the end of each class, we debrief and students either share out what they accomplished or struggled with–and as they get further along, they might share some of their actual script.
Once they’ve finished their scripts, they submit for approval. My class is small enough that I can have one-on-one chats where we walk through the Criteria List to see if they’re draft is ready to record. After making suggested revisions, it’s podcast time!
Before I go any further, I know that the recording process and the publishing process are major barriers to most teachers entering into the podcast realm with students. I’ll be teaching a class on May 15th that goes more into detail, but here are some basics to get you started.
Find a recording software that works for the tech you have available. If you have iPads, GarageBand may be a viable option–but beware, GarageBand requires lots of storage. This is why I prefer BandLab. BandLab is a cloud-based recording app. That means it will work on any device, including Chromebook. The downside is that it requires a bit of processing power, so it can take a bit of time to load on older Chromebooks, but I’ve used it on 4-year-old clunkers in the past, and it’s worked fine–aside from requiring a bit more patience than usual. Whether using an older or newer device, be sure to have students hit “Save” every 5 minutes or so. Since it works on the cloud, if you have a wifi outage partway through, you might lose your work. Despite these issues, BandLab’s user-friendly interface, accessibility, and recording capabilities outweigh any potential costs.
Now, if you go with BandLab, don’t go with a regular account. Set up a teacher account here: https://edu.bandlab.com.
A teacher account allows you to set up a sort of classroom that students can access with a code. Through the app, you can set up assignments–and you can check in on students recorded works-in-progress–just like in Google Classroom.
Now, it’s time to tackle the recording process. Once you’ve set up your BandLab Edu classroom, you’re ready to record. I made a 2 minute tutorial on how to use BandLab below! If you’re using a different application, the basics I share in the video below still apply; the bells and whistles might just look a little different.
Another great thing is that you don’t even need microphones. The computer’s built-in mic works just fine (on May 15, I’ll show you how to EQ flawed audio to improve the sound in post. It’s easier than you think), but if you have the funds available, there are plenty of good, affordable USB mics out there that plug right into your device. Note: iPads require a more elaborate setup.
You’ll also want to set up a recording schedule of sorts so that you don’t have every student trying to record in your classroom at once. Here are some approaches that have worked for my class:
- Put students in groups: more groups means fewer recording sessions.
- Recruit parent volunteers, principals, counselors, intervention/learning specialists, or school aides to help out: that way you can send students with adult chaperones to different parts of the school to record in a quiet setting!
- Set up a staggered schedule for recording so that on some days students record, and on other days they assist or help produce a classmate’s podcast.
I’ll get into some more ins and outs of writing and recording podcasts in my May 15th PD (mixing, editing, music, recording tricks, avoiding predictable problems, and creating the actual content that students record), but this should be enough to get you and your students started! You can also find lots of good tutorials on YouTube on on BandLab’s Help page.
One last thing: if you make an assignment in BandLab, set a due date that is nowhere near your actual due date because projects can run long–especially the first couple times. If students try to edit after the due date, it won’t let them save their work. Easy fix, but it’s still a bit of a hassle.
Publishing
Once students are done recording, encourage them to go back and listen to their podcast–and to each others’ podcasts–to make sure it all sounds “right.” Classic first-attempt errors include having some parts that are way louder or quieter than others and having accidental gaps of radio silence.
Now, how does one publish these podcasts without breaking any privacy rules?
My school has a blog feature in it’s website that allows us to create password-protected page for student blogs. So, you might start by asking someone in IT or school administrator if something like this might be possible. If the sound files are too large for your school’s website, you can always just upload each podcast episode to Google Drive (or have your students do it for you), and then share a link to the podcast audio.
SeeSaw, also allows you to upload audio. Don’t have access to any of these? You could always share Google Drive links to Padlet. The reason I prefer a blog, SeeSaw, or Padlet to just sharing a Google Drive folder that contains each episode is that part of the fun is in having students write up an episode description to go with the sound file. If students are sharing a project that involves research, episode descriptions are a great place for them to list their sources. That said, anything you manage to share will be pretty cool. Plus, you can always start small and add more components as you go.
In the end, use the resources you have available, and don’t be afraid to get DIY-creative. If the best you can do is a Google Drive folder that you link in your parent newsletter, then so be it–people will still be impressed, and your students will be excited to to have published content. Podcasts, like every other cool thing we might try out, can be tricky, but they also can inject a lot of fun and innovation into the home stretch of your school year.
What kind of work do you do with student podcasting? I’d love to hear all of your ideas around helping students record and publish content. Leave me a comment below! And if you’d like to know more or stay in the loop for details around my May 15 Podcasting PD, follow me on Twitter @MrWteach and stay connected with the MW community @MovingWriters.

1 Comment